Showing posts with label Organize & Simplify. Show all posts

Tuesday, February 11, 2014

What's a Playroom without Toys?!?

Time to reinvent the playroom again, this time eliminating the toys! I have been faced with this situation a couple times now with clients and their growing kiddos and now even in my own home. Does this mean I have officially gotten old (don't say anything, just allow the silence)?! It all happens in a blink. All the sudden I catch my oldest hauling his Lego table into his little brother's room and I am like "what are you doing, take that back to your room, sit down and build something"! When we have a "playroom" we try so many years to create the perfect setup for our kids. Even from baby to toddler we have to reinvent the space several times as their play changes. My newest client has three girls and they are entering the "tween" ages. Well, all except for the littlest one and she will probably be ushered into tween hood early as a result of having 2 older sisters, right?! (I can say that being the youngest of three girls)! The request from my client was to turn their playroom into a space with some kind of desk/lap top area and a seating space for reading and lounging. Here is where I went with it! 

THE LAPTOP BAR 
(the only kind of bar they are allowed to pull up a stool to!) 
I love the look of the reclaimed industrial wood and metal tables! And many also have the casters at the bottom making them roll in case they need it to pull it to the center of the room for extra eating or craft space. An added bonus; they are indestructible and they give that urban coffee house look! Although I don't recommend mixing coffee and tweens! If you look on Pinterest you will find lots of versions of these industrial style tables, with and without casters. They are also known as "pipe tables" and you will find many DIY tutorials like this one below over at "Cafe Carolina"! Very cool!
 Below is one with the silver pipe look and a lighter bleached top. There are many ways to configure the pipes at the bottom depending on how you want to use the table. I have also seen versions with a wood shelf at the bottom too for extra storage, maybe a printer or even just a plank as a foot rest if you are sitting at it as a computer bar. 

For the stools there are a few options I like! There are these industrial looking stools I found at World Market. We have the ones below in our playroom and I love them as you can swivel the seat up and down depending on your height.


I also would love the look of an acrylic clear chair at the desk! Since some of them can be pricey, Ikea has a version of the ever popular acrylic chair too and they have it in clear and a smoky grey color.  

For the lighting I saw this very cool DIY hanging bulb. Of course there wasn't a source listed for where it came from but there are many types of wall brackets you could use for this and light and cord kits you could tie up around the bracket. And the best part is no wiring! They plug in to the outlet!
Via: unknown, Pinterest

If you aren't in any way into DIY, you can find ones similar to this (loving the Edison bulb) on Etsy (the destination of all things cool and unique, in my opinion) Check out this one from Iron Clad Industrial!!
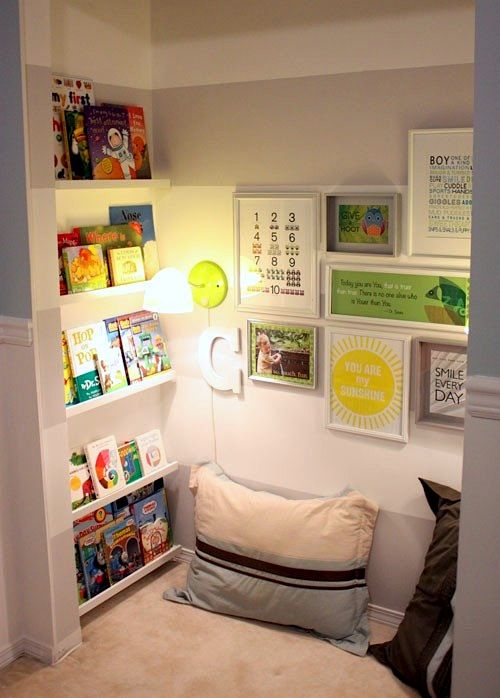
The Seating Lounge 
I used a bookcase type piece to replace a side table in between the chairs so the girls have room and shelving for books, magazines, I Pods etc! I also love the idea of having baskets and boxes tucked away on the shelving for craft things or whatever else they are into. Then almost as important as filling space I left a huge area in the center on the rug for... nothing at all! If they decide to put a TV up in there this space could be used for floor pillows or bean bags. The corner of the room and one wall were left open in case there is a need for a chest or shelf with some of the toys/items they can't part with quite yet.  I love the idea of the room being a girl's lounge area but also a stylish extension of the house. You will notice I used splashes of "girly" colors but it by no mean screams, "teen palace"! Parents welcome here! That's how I run my house:) After all we do foot the bill, right?! If you don't want hot pink walls, we should be able to come up with a compromise, yes?!

Refresh on the Adult Office, Why Not?!
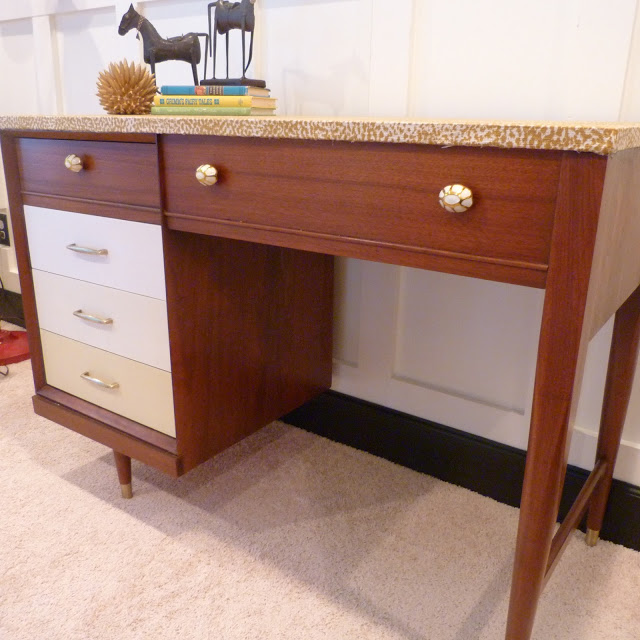
My client also has an official adult office space off the kitchen and mudroom area.  In this case they already had a large built in wrap around espresso desk and overhead cabinet similar to the one you see below. They also have a big carmel color leather sofa they want to keep in the room similar to the one below. My recommendations for this room are to change out the carpet to a lighter color as the build in and overhead area and carpet are all a similar tone of brown and it makes the room feel dark and small. They currently have a wall of frames behind the couch which I am going to recommend they organize on 2 to 3 shelves overlapping them to create more dimension and interest. I also added gallery lights up over the gallery wall. If you don't want to wire lights like this, there are plug in options you could run the cords behind the leaning frames, which is another plus to having the frames not directly on the wall. You could also lean other objects like a small mirror or wall clock on the shelves as well.
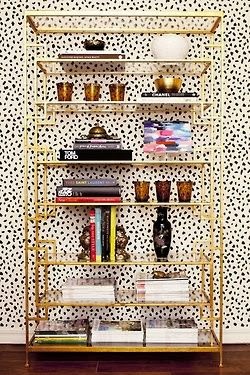
They currently have a wallpaper they are sick of between the wall cabinet and the desk and I am loving this grown up fun version of polka dots for a classic but sophisticated office look. 
Below is another shot of the paper behind a bookcase wall. Sophisticated but fun and the pattern does not overwhelm any larger pattern and color plan on the pillows or any rug she decides to use down the road! On the gallery wall I am thinking of a light gray or white to make the focal point the pictures themselves.

Source unknown, Pinterest
So what do you think?! You ready to clear out the toys yet or breathe a little life into your own working space?!?  Change is good! Don't be afraid of patterns...THE END

Cheers!! {Laura}

Thursday, August 22, 2013

What Can I Say, Neurotic Behavior Runs in the Family. . .

When Laura and I started chatting about posts for this week, we both had our minds on organization and controlled craziness. I have always kicked myself for not adding a home office when we built our house seven years ago. For the first four years I kept our bills and mail in a nice little basket in our laundry room. But now that we have two kids in school, papers and mail flying in rapid fire and an actual calendar of events to track, I had to reorganize my kitchen (aka, the place that 90% of my life is lived!) and create a place that would make my calendar, bills and school papers easily accessible. We have a spare bedroom, but the thought of walking upstairs every time I want to look at something is daunting. I'm also not a fan of calendars and stacks of papers (or baskets of papers) on the kitchen counters.

Luckily, I have a fairly large pantry and decided I could dedicate a shelf or two as my "office". Here's the space pre-makeover.


When I decided I wanted to commit to the space long term I decided it needed a makeover. I started by taking everything out and moving the shelves up and down for optimal storage and leg room to sit.

BEWARE: This little exercise actually involves reorganizing your entire kitchen! 

Then I found some scrap wallpaper and decided to wallpaper the wall. 

To wallpaper, make sure your wall is clean. Measure your space and cut the paper accordingly. If you have to use more than one sheet for the width, make sure to marry your pattern up at the seams before cutting the second piece. Measure and mark the paper on the backside. I always hang wallpaper sheets left to right.  When you do this, remember to measure and mark the back of the second sheet from the right hand side so that you keep your pattern continuity. 


Then apply wallpaper paste with a paint brush or roller. I used this ULTRA Clear product that does not require you to prime the wall beforehand with certain types of wallpaper. 


Use a flat edge smoother to get any air bubbles out. 

And wipe any excess wallpaper paste off with a damp sponge. Wallpaper paste tends to yellow as it dries.

I already had the Pottery Barn Daily System installed, but decided to designate each bin to one of my kids for homework, permission slips and school handouts. 

P.S. The Daily System is now on SALE at Pottery Barn!

The result: An organized and vibrant space!


Happy Organizing! {Erin}

Tuesday, August 20, 2013

Back To School, Time to Get Your Sh$%T Together Moms!!

I am a person who craves routine! I also like to play hard and have fun... the perfect storm for brewing a crazed lunatic, I know! I can very quickly forget about school and all the routine that it requires  and enjoy the freedom of summer. But, come back to school time and all my anxiety as a former student come back to haunt me and I wake up in the middle of the night being chased by a math book holding a knife! To keep my anxiety in check and more importantly to not make my kids neurotic head cases, I need the routine part to be nailed down. Last year before school started I planned a space for homework papers, shoes and book bags in our sun room. This has literally saved my life! I knew that my system of magnet clipping loose papers to return to school on the fridge was not going to be a good system for two kids in grade school so I needed order. Here is what we came up with. You can read about how it was built in more detail on my post from last year


The calendar that you see on the left hand side is a dry erase calendar for school days. I created it using a Hobby Lobby Frame and paint color chips from the paint store. It is an easy check for what is due at school for the week and what practices or school events the kids have going on. It helps them keep organized and plan out their week. 


I also tend to be more lax in the summertime when it comes to chore charts and reward systems for keeping their responsibilities on track. I do think they work and now that my kids are older and the chores can really benefit the whole order of the house, I'm all for trying out new ideas! I found this one and liked the idea of giving kids the option to choose their poison when it comes to jobs. 


I think you could go a step further and add a monetary amount for completing each job with the bigger jobs holding more value. Then at the end of the week you could "pay out" their earnings based on which sticks were in their mason jars for the tasks they completed. Kinda makes it interesting and introduces allowance in a fun way. 

I saw these magnet boards on Etsy at "More Than A Memory" where the magnets had monetary value and then they get moved to each kid's metal board. This would work too!!


For me, as a pen and paper girl, I am always on the quest for the perfect planner. I think I found one that is just customized enough to fit all my "mombligations" without having to succumb to technology for my to do list. Enter Plum Paper Designs on Etsy! They allow you to customize the planner in various ways but I will show you how I did mine as an example. 

You can choose from so many cute designs on the cover and customize with your name or a photo. 


Easy turn tabs for the months of the year and she creates the calendar from the month you order, not the start of the year, so you can get organized anytime!


I love that she allows you to organize your day by customizing categories which helps to keep personal and family obligations straight on your calendar. For example, on my calendar I chose a "workouts" section to keep myself on track for what I need to do. I know that several examples included meal plan for the day which would also be a good way to stay on track. 


She also has wedding planners (this really could have blown my trapper keeper out of the water back in the day organizing my wedding!!), announcements, journals, gift tags and all sorts of other things to keep organized and be cute at the same time. 

At the end of this summer I made over a desk for my son's room. There comes a time in a boy's life when he needs a desk of is very own. I think this is the year! 3rd grade has come with threats of homework torture. So, this year was the time to shut my poor baby away in a quiet space to learn the hard fast lessons of homework and concentration!  This is the before, an old sewing desk found along side the street in suburbia...


And here she is after a little face lift. Details on how it was completed on this post. 


I came across this unique space saving desk solution on Pinterest and thought it was pretty cool. If your house is like mine, they don't make the bedrooms very big these days!! This would be a perfect solution. 


And of course if you have an extra closet to spare you can always make your desk in the closet like these great examples. These pretty much represent all the scenarios. The first example has closet doors removed, the second one keeps the doors and uses them as extra storage opportunity and the last example is a sliding closet door. 


I thought that the space below was a genius use of a otherwise wasted stairway landing for a quiet space to do homework! Don't you agree?! 


What about reading nooks for the kiddos?!? I love these spaces created in all different places in their rooms to encourage snuggling up with a book! These are all doable and would be fun makeovers for back to school time. If you have a window in your kid's room, consider a window seat! Love this one with the mounted light, pillows and bookcase below. Perfect!


Here we are using the empty closet idea again, this time for a reading nook and loft! So cute!!


 This one is a closet reading nook as well. I love using the side space in the closet as shelving for books. So cozy and cute!


And if you have neither a window or an extra closet to use then I love the idea of doing tented fabric for a cozy spot to read books! This could be done for either a boy or girl with the right fabric. Or you could use a more standard looking tepee for a little boy. 


Hope you all got some good ideas to kick off fall and back to school time! I know I need the push to get back on track and sometimes creating spaces for your kids to do activities independently can benefit the kids as well as parents. I think that's what they call win-win, yes?! 

Here's to not pulling my hair out this year:)!! Off to math homework... Ugh...

Cheers!! {Laura}


Tuesday, August 13, 2013

Stressing Over Paint Colors, Don't Bother!

I started out a couple years ago doing paint color consults. I will have to admit I love color and have used A LOT of color on the walls and have always kinda felt like it was the quick easy way to breath life into a room. 

If I had it to do all over again, like if maybe if I were building, I would design it on a white canvas. I would pay much more attention to textures than colors and my pops of color would be in fabrics, artwork and furniture rather than paint. I'm a clean freak and so you would think white would be a nightmare, right?! Wrong! White is more forgiving of scuffs, chips and finger prints than dark walls and the look just exudes clean, fresh and uncluttered. Oh and if you are thinking that it seems a little cold or minimalist, think again. It definitely doesn't have to be! Check out some of my white wall finds! 

*all images below pinned via Pinterest onto House Envy Blog


Oftentimes when it comes to a whimsical fun room like a kids room, nursery or playroom we think we need to pick wall color appropriate to the theme. However, kids spaces are probably one of the best candidates for a white backdrop because you may have  a lot of color in toys, artwork and accessories. 


White is a great color for taking advantage of texture and pattern. A well designed house with lots of architectural interest is perfectly showcased in white. 


I love the interest and texture in these alternative wall materials


Nothing brightens and modernizes a room more than updating heavy dark brick and stone than painting it white!


My absolute most favorite look is white walls in contrast with dark brown or black flooring! Perfect contrast and such a dramatic look!


Hope these examples give you a great sense for how white can be the perfect backdrop to decor and architecture. Are you bold enough to try white? 

Cheers!! {Laura}


Related Posts Plugin for WordPress, Blogger...