Showing posts with label DIY. Show all posts

Tuesday, April 8, 2014

Type A timelines and "to do" lists.

The good news is that the birds were chirping when my alarm clock very rudely interrupted my dreams this morning. Chirping birds must mean that we are getting close to spring, right? And more importantly, the end of the school year! T-minus eight weeks and the kiddos are home full-time. The nearing of this calendar event brings two categories of feelings: the first is excitement to have the summer nearing and a less rigorous schedule to abide by. The second feeling is total panic! There are still so many projects I want to finish before the two-and-a-half month blur known as summer starts! 

So I thought I'd share a few of the "to do" projects on the list in hopes that by putting them in writing, I will feel an overwhelming need to actually get them all done! I'm a little bit type A. A list maker, a list crosser-offer. So this is my online list and I'm hoping to get them all crossed off in the next eight weeks. 

I am still working on our den that I posted about a few weeks ago. So I guess that is 
No. 1 on the list. 

No. 2. Remember my son's room makeover that I posted about in February? Well, what I didn't show you was his dresser that didn't quite get made over.


I don't want to make excuses, but it was just too d@#! cold to paint in my garage! I want to do something two-tone with more modern handles. 


source

P.S. If you haven't bumped into the Martha Leone Design blog, go there. Now. She has some crazy great furniture makeovers!

No. 3. I found this old telephone table at a thrift store several years ago. I have used it as a place to hide TP and air freshener in my downstairs half bath. 


Some of the inlayed mirrors are cracked and scratched, so those will have to come out.  I am thinking inlayed wood of some variety in place of the mirrors.


No. 4. And finally, I inherited this wood coffee table from my mother. It is a massive table and it has great detail, so I'm going to attempt to rescue it's pickled wood self from the 90s.


I found this amazing DIY mirror on the blog Crazy Wonderful. Hmmm. Maybe a faux inlayed top?


Mark. Get set. Go!
Chirp chirp! {Erin}

Thursday, January 16, 2014

A Modern Buffet Makeover Inspired by a Bangle

Well you have to inspired by something, right?! I had stared at the buffet I got for a steal at Midland Antiques (a local Indianapolis favorite) for almost two years before deciding how to redo it! And since we are in the midst of my front room/dining area makeover, read more about it HERE, it was go time or curbside it would have gone for this piece! Here was my inspiration... an old bangle bracelet given to my daughter in a bag full of play jewels!


If you have been following along, my adjoined rooms are headed toward a mostly black & white look with pops of yellow gold and emerald green. As a refresher here is my inspiration board.

If you recall this is what my buffet looked like...
BEFORE!


It has a missing piece off the bottom which we replaced with scrap wood from the trim project on the wall and it also had lots of nicks and chips that needed to be filled in with wood putty. The snow storm brought some elves to help me prep my piece. I was actually very impressed with my daughter's putty knife skills....for some, pride comes in high marks and athletic ability but have you ever seen your kid spackle and sand with proper technique?!? Melts my heart!:) 


So basically we filled in our gauges with wood putty and sanded them smooth. We started out running the steel wool over for a light sand and it was more necessary to use on the thin wood detail on the front but the top and sides ended up getting a once over with the power sander, which by the way, is such a great alternative to hand sanding. You get a way smoother finish much much faster! 


Then I decided to use oil based paint on this project because I love to get high when I can squeeze it in... No really, that wasn't the reason. But it is very stinky so open your windows if you can! The benefit of using an oil based paint is that it glides on smoother and gives more that spray painted look. Sometimes the latex finishes show more brush strokes and don't give as smooth of a look. And when you use oil based paint you must use oil based primer!! Water based latex or enamel paints will not stick to an oil primer. 

Oh and next to the primer...That's my coffee as I decided to stop drinking Diet Coke (will save more on that for another post describing why I could probably donate my body for research on rat poisoning) Like any addict I am not sure how long my strike will last and like any addict I may talk myself into why the FDA would not hold back on the public but in all honesty I know for sure they prolly would! So we shall see. For now, coffee..... 

Back to the makeover! There is my son, being exposed to the toxins I just mentioned in oil based paint:) Look at that smile, will ya?! Just kidding:) He just rolled the top then I kicked him out! Don't call child services yet!

And without boring you with the taping off details and the step by step process of rinsing brushes and swapping out paint to get the three tone look I wanted for it, I will instead just show you!! That's what you want anyway, right?! You can figure that the steps that got it from primer through two paint colors to finished product were just a mix of patience and a steady hand on the brush!! 

OK so recall the BEFORE...

AFTER, A mid century modern buffet meets an art deco style room make over and a black white and brown bracelet for inspiration!!  And hopefully, if I know at all what I'm doing, it will all mesh! 

In a nut shell, I used a black oil based paint, just the pre mixed black they have in the section of oil based paints in Lowes. I used the black on the top and sides and then on a piece at the bottom (see later pictures for details on the bottom). Then on the trim pieces around the mirror I used the white pre mixed can in the same section. I left the original stained wood then for the area that angles in and surrounds the white trimmed out mirrored area and also some at the bottom. As a final coat, I used a gloss finish brush on polyurethane to protect the finish. 


So what do you think?? Will it fit in with my decor in the room?! I have 2 side tables that are next to finish for either side of my emerald green sofa and I have two cain back chairs that I need to finish spraying before we reupholster them!! I am so excited about this room!! It feels good to have gotten this piece checked off the list!! 

Cheers!!
{Laura}

Wednesday, January 8, 2014

REVEAL! Floor to Ceiling Trim & Chandelier Facelift

Happy New Year!!! 2014 is upon us and I feel like I can't shake 2013!! Or maybe it is that I can't shake my kids and get back to any kind of normal routine as school here is still closed, Day 21 of break!!! Ah the Midwest... It keeps choosing us year after year:)

But enough about that... It's business time! Before the holidays you may recall in this post Front Room Rescue Project I shared my multi phase plan (the tortoise is winning this race) to redo my adjoined front room and dining room. 

Here's a little peek in case you need it before I dive into the gory details....

But of course I will need to drag you through the gory details before I show you any other "after" pictures. So back we go to the beginning of time... This is the room as it was before we began clearing it out via Craigslist....(I'm having one of those, "What was I thinking?!?" moments right now) Gees! It's like a skittles commercial!! 

As a refresher, below is where I plan to go with the new color scheme and design.... Much less going on in this plan as far as shapes and color go. Although I still love my colorful rug (above) so I guess I will just have to move it and redo another more neutral colored room around it:) 

In the dining room side I am recovering my moms art deco black lacquered chairs to go around an over sized modern round table similar to this one below!

Remember my moms chairs?! Love them and can't wait to get them recovered!!

So we started before Christmas by emptying my rooms and Craig's listing everything which has helped pay for several things thus far! And we started by doing our feature wall trim! I did not share my idea for the wall in my plan as I wanted to keep some element of surprise! Because I was going from lots of color to all white I wanted architectural detail in place of color. I drew out a modified version of a wall I had seen several months ago and had our trim carpenters apply the math. Trim carpentry and math have never been my strong suite (that lethal combo with like 21 days of winter break could make my head explode off my body)! 

Better, I draw it and they will come! And by "them" I mean my trim carpenters. These two guys are the ones who finished our basement and we have grown to work together like PB&J (it may not have always been that way). If I explain what I want they look at me like I'm nuts. Then I draw it and they feel sorry for me and apply some kind of mathematical solution and then just like that, a star is born! Here is my drawing... I know, right?! 

And here is their mathematical genius at work 

They had to take off the original crown and molding on the feature wall and bump them out with a 2x4 piece of wood behind so the crown would line up in the corner and so that the trim work would not be sticking out further then the new trim detail. 


And in a magical few day's time that would have taken me years to complete, here you have it! We painted in a high gloss white Pro Series enamel by Sherwin Williams to give it the sheen I was looking for without the expense and toxicity of applying lacquer (although God knows I would have loved me some lacquer!)


Our old Etsy find chandelier I got years ago in this dining room was all white (forgot to take the "before" up close before I started painting but it is in this pic below) and I thought it may look a tad richer in this new room in gold and black! So enter spray paint, the solution for all things the wrong color:) 

Chandelier BEFORE: 

And AFTER, in gold and black!


For the area where the chain meets the canopy at the ceiling I wanted to do something that was more unique and more modern than some of the very traditional medallions you see out. I bought a couple small star burst shaped mirrors awhile back and one day as I was staring at one of them on the ledge of our office I thought, "that's it!! I will bust out the mirror and use the metal star burst as my medallion. Again, a star is born, literally! 

So here it was perched up in my office...

And here it is as my new medallion:)


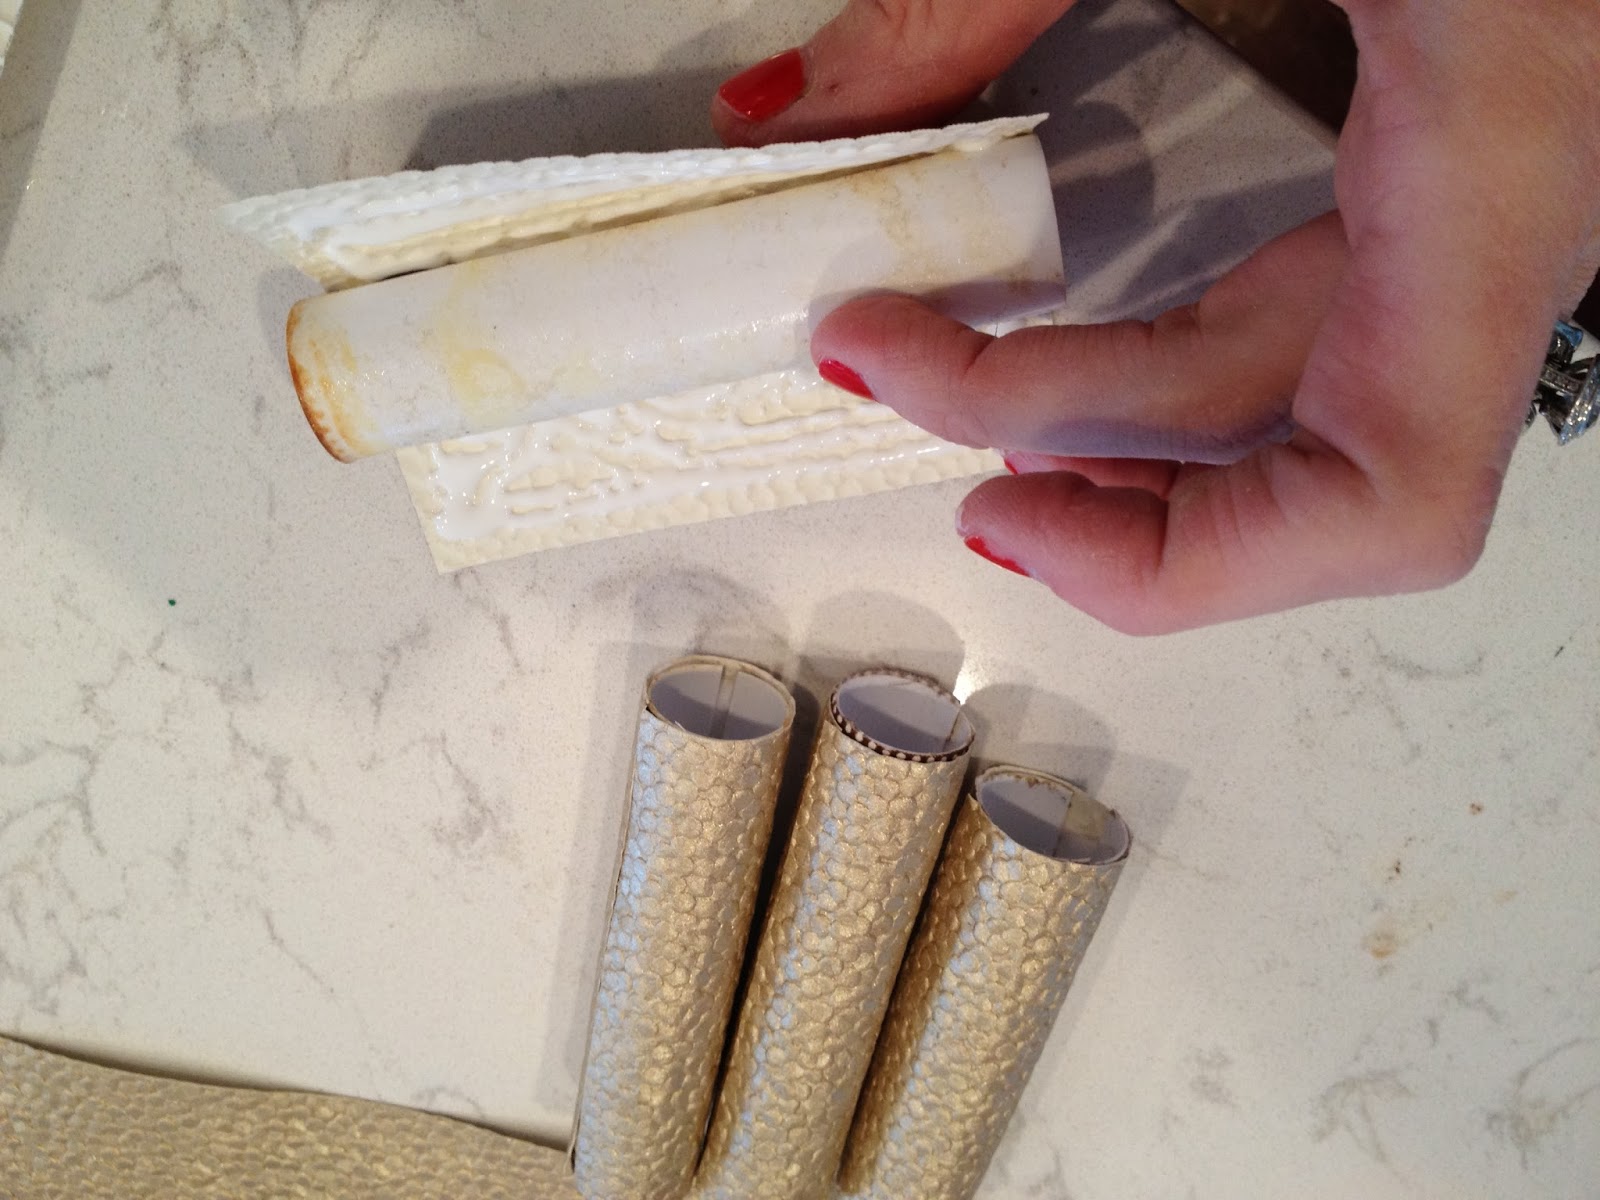
As for the boring white plastic candle stick covers they use to cover the wiring on these old chandeliers I used craft paper from Micheal's and spray adhesive to cover them and give them the gold color and a fun texture!!

The brown and white striped fabric is what I had on them before when the chandelier was white. 


You might have noticed in some of the photos a little something that looks like this?!

This is the gold and white paper I used to cover my ceiling in these rooms! I love the way wallpaper can look on the ceiling! And when you are using a high gloss all white paint scheme for your walls and trim, it is a big buzz kill to go from that look on up to the chalky white textured ceiling:( So, we knocked down the texture and skimmed mud over, primed and papered them!! I like the subtle pattern on this particular paper since the feature is to be the trim design on the wall. Plus this paper was a bargain at only $22.00 a roll! 


So there you have it, feature trim wall (check), white high gloss paint (check), gold and white polka dot wallpapered ceiling (check), white chandelier spray painted (check), funky modern ceiling medallion (check) and I almost forgot to mention my bright yellow curtain panels!!! Did you notice?! More details on these beauties in the next update!


Also up for the next update in this room...Remember this buffet that was in the room?! I got it at an antique mall a few years back and have been waiting to redo it until my vision for the room was set.  

And if you recall I said I was going to use this bracelet for my inspiration to paint it?! I used all three colors and it turned out very cool and looks much more art deco! Can't wait to share it with you early next week!! 

Happy New Year!! School is canceled tomorrow...again!!

Cheers (insert more wine)!
{Laura}

Related Posts Plugin for WordPress, Blogger...