Sunday, February 23, 2014

Client Makeover That I'm Totally Stealing!!

But can you really call it stealing I ask?! I think not!:) I love working on all my client design boards because they allow me to step out of my own design tastes and really try to capture their personal style. Sometimes that can be hard for several different reasons and some have never really gave much thought to their likes and dislikes so they may not have a strong preference for a specific style. 

But I could tell from the start that this client was a style savvy girl who enjoyed keeping up on the design world. She made reference to design blogs she follows and whipped out her House Beautiful & Domino magazines to give me some inspiration! The ones she happened to pull out were among some of my favorites too and when I win the lotto and get our second home I will maybe turn a tad more traditional in my weekend home! When I asked her what her go to store was she said West Elm which is typically more modern. Ah ha!! A hybrid client who likes a meeting of the best pif both worlds...just like me. So we took the classic and traditional look she likes and mixed it with a more modern twist by adding some things you just may see at a store like West Elm! Here she goes and of course I will break it down in what follows...

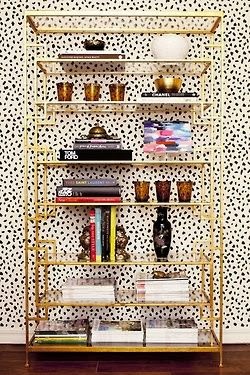
The brown sofa is similar to the one she has in the room and one we need to use in the design. I always ask clients what pieces need to stay so I can make sure to plan everything else around what we have. 

Below are the couple favorite mag cover looks she showed me as inspiration...


Here is the room (also under trim work construction) as it currently stands. The plan is to paint the trim work and the fireplace detail a warm but bright white. This picture is awful as it was a phone pic but if you can tell, the brick around the surround is dark and my suggestion would be to paint the brick the same color white as the trim and surround. The main thing I wanted to do was bring down her ceiling height a little by adding something above the fireplace that creates height and drama. 

I loved the idea of using three long rectangular mirrors and hanging them horizontally to create this look! Then I thought we could add some cool traditional sconce lighting on either side to illuminate the drama and create some mood! 

Here are some other images I found on Pinterest of using floor leaner mirror on their side in a group of three! The nice thing is that these mirrors are oftentimes very inexpensive! Everybody likes that, right?!?
 Via: Pinterest, not sure of original source
 Via: Pinterest via Olga Polzzi 

Their TV is currently sitting on a sofa table in a nook that will be right across from where we position the couch. Here is a photo of what it looks like now.

And below is what I am proposing. I think we can fill in the space between the table top and bottom ledge with baskets. Typically you see a TV on a media console that has some kind of storage underneath, drawers and cabinet doors etc. Since this table style is more open and narrower in width I propose hanging the TV on the wall and scooting the table out off the wall just a little. The baskets below can be styled with firewood, blankets and pillows or they could serve more practical storage for games, toys etc. Then we fill in with decor!! 

So there you have it! I am excited to see how this one turns out and hopefully we can do a big reveal when its all together! We also picked a fun pop color for all her lower level doors so I am excited about that too! 

I am close on being able to share the final results of a dining room makeover that turned out so good! If you recall the dining room plan with the sage green china cabinet we painted black and stenciled way back?!? This is the dining room!! And I am working on some very cool side tables for our own front room! Did I mention my emerald green couch came in for the front room project?!? And lastly I am working on lots of new photos for a  Home Tour feature coming up in a couple weeks! Stay tuned....

Cheers!! {Laura}

Tuesday, February 18, 2014

Basement Makeover REVEAL!

I gave you a sneak peak of our basement refresh last week. Here, again, is where we started. . . 

And here are the changes! The main change was painting the stripes on the walls and adding a green accent wall. The addition of color has really given this room a fun and fresh feel. We also added inexpensive and transitional toy storage that will allow us to convert the toy area as our boys grow and their needs change. 


Thursday, February 13, 2014

Basement Makeover Underway!

We are not basement people. If you live in the Midwest, this is pretty much blasphemy because everyone has a basement and a lot of people use it as an extension of their living and entertaining space. And there are some beautiful basements out there - Laura's for example! We are just not those people. 

But that being said, our basement was borderline depressing. We don't have a bar or kitchen or even a bath down there, but it is big enough to house the toys we don't want to look at on a daily basis. And when I say "house" I really mean dumping ground. As you can imagine, not even my kids wanted to dwell in this sad place, so changes have been underway! 

Here is where I started. WARNING: It's a very sad place. Don't look if you're feeling emotionally vulnerable right now.


Here is a sneak peak of the progress so far. 


Full reveal of the changes next week!

Happy Weekend! {Erin}


Tuesday, February 11, 2014

What's a Playroom without Toys?!?

Time to reinvent the playroom again, this time eliminating the toys! I have been faced with this situation a couple times now with clients and their growing kiddos and now even in my own home. Does this mean I have officially gotten old (don't say anything, just allow the silence)?! It all happens in a blink. All the sudden I catch my oldest hauling his Lego table into his little brother's room and I am like "what are you doing, take that back to your room, sit down and build something"! When we have a "playroom" we try so many years to create the perfect setup for our kids. Even from baby to toddler we have to reinvent the space several times as their play changes. My newest client has three girls and they are entering the "tween" ages. Well, all except for the littlest one and she will probably be ushered into tween hood early as a result of having 2 older sisters, right?! (I can say that being the youngest of three girls)! The request from my client was to turn their playroom into a space with some kind of desk/lap top area and a seating space for reading and lounging. Here is where I went with it! 

THE LAPTOP BAR 
(the only kind of bar they are allowed to pull up a stool to!) 
I love the look of the reclaimed industrial wood and metal tables! And many also have the casters at the bottom making them roll in case they need it to pull it to the center of the room for extra eating or craft space. An added bonus; they are indestructible and they give that urban coffee house look! Although I don't recommend mixing coffee and tweens! If you look on Pinterest you will find lots of versions of these industrial style tables, with and without casters. They are also known as "pipe tables" and you will find many DIY tutorials like this one below over at "Cafe Carolina"! Very cool!
 Below is one with the silver pipe look and a lighter bleached top. There are many ways to configure the pipes at the bottom depending on how you want to use the table. I have also seen versions with a wood shelf at the bottom too for extra storage, maybe a printer or even just a plank as a foot rest if you are sitting at it as a computer bar. 

For the stools there are a few options I like! There are these industrial looking stools I found at World Market. We have the ones below in our playroom and I love them as you can swivel the seat up and down depending on your height.


I also would love the look of an acrylic clear chair at the desk! Since some of them can be pricey, Ikea has a version of the ever popular acrylic chair too and they have it in clear and a smoky grey color.  

For the lighting I saw this very cool DIY hanging bulb. Of course there wasn't a source listed for where it came from but there are many types of wall brackets you could use for this and light and cord kits you could tie up around the bracket. And the best part is no wiring! They plug in to the outlet!
Via: unknown, Pinterest

If you aren't in any way into DIY, you can find ones similar to this (loving the Edison bulb) on Etsy (the destination of all things cool and unique, in my opinion) Check out this one from Iron Clad Industrial!!

The Seating Lounge 
I used a bookcase type piece to replace a side table in between the chairs so the girls have room and shelving for books, magazines, I Pods etc! I also love the idea of having baskets and boxes tucked away on the shelving for craft things or whatever else they are into. Then almost as important as filling space I left a huge area in the center on the rug for... nothing at all! If they decide to put a TV up in there this space could be used for floor pillows or bean bags. The corner of the room and one wall were left open in case there is a need for a chest or shelf with some of the toys/items they can't part with quite yet.  I love the idea of the room being a girl's lounge area but also a stylish extension of the house. You will notice I used splashes of "girly" colors but it by no mean screams, "teen palace"! Parents welcome here! That's how I run my house:) After all we do foot the bill, right?! If you don't want hot pink walls, we should be able to come up with a compromise, yes?!

Refresh on the Adult Office, Why Not?!
My client also has an official adult office space off the kitchen and mudroom area.  In this case they already had a large built in wrap around espresso desk and overhead cabinet similar to the one you see below. They also have a big carmel color leather sofa they want to keep in the room similar to the one below. My recommendations for this room are to change out the carpet to a lighter color as the build in and overhead area and carpet are all a similar tone of brown and it makes the room feel dark and small. They currently have a wall of frames behind the couch which I am going to recommend they organize on 2 to 3 shelves overlapping them to create more dimension and interest. I also added gallery lights up over the gallery wall. If you don't want to wire lights like this, there are plug in options you could run the cords behind the leaning frames, which is another plus to having the frames not directly on the wall. You could also lean other objects like a small mirror or wall clock on the shelves as well.
They currently have a wallpaper they are sick of between the wall cabinet and the desk and I am loving this grown up fun version of polka dots for a classic but sophisticated office look. 
Below is another shot of the paper behind a bookcase wall. Sophisticated but fun and the pattern does not overwhelm any larger pattern and color plan on the pillows or any rug she decides to use down the road! On the gallery wall I am thinking of a light gray or white to make the focal point the pictures themselves.

Source unknown, Pinterest
So what do you think?! You ready to clear out the toys yet or breathe a little life into your own working space?!?  Change is good! Don't be afraid of patterns...THE END

Cheers!! {Laura}

Wednesday, February 5, 2014

Boys Bedroom Mini Makeover REVEAL!

I'm beginning to feel like a character in the movie "Groundhog Day". Yep, we woke up to another 6 to 8 inches of snow! Schools and most businesses are cancelled and we are having another official "snow day". The good news is that the snow did not come with an arctic vortex of below zero temps, so we can enjoy it this time around!


So with all the cold outside, I thought I'd reveal a snuggly spot inside. I finished my oldest son's mini room makeover that I posted about a week (or two) ago!

And here are the makeover results!


Stay Warm! {Erin}
Related Posts Plugin for WordPress, Blogger...