If you have been following along, my adjoined rooms are headed toward a mostly black & white look with pops of yellow gold and emerald green. As a refresher here is my inspiration board.
If you recall this is what my buffet looked like...
BEFORE!
It has a missing piece off the bottom which we replaced with scrap wood from the trim project on the wall and it also had lots of nicks and chips that needed to be filled in with wood putty. The snow storm brought some elves to help me prep my piece. I was actually very impressed with my daughter's putty knife skills....for some, pride comes in high marks and athletic ability but have you ever seen your kid spackle and sand with proper technique?!? Melts my heart!:)
So basically we filled in our gauges with wood putty and sanded them smooth. We started out running the steel wool over for a light sand and it was more necessary to use on the thin wood detail on the front but the top and sides ended up getting a once over with the power sander, which by the way, is such a great alternative to hand sanding. You get a way smoother finish much much faster!
Then I decided to use oil based paint on this project because I love to get high when I can squeeze it in... No really, that wasn't the reason. But it is very stinky so open your windows if you can! The benefit of using an oil based paint is that it glides on smoother and gives more that spray painted look. Sometimes the latex finishes show more brush strokes and don't give as smooth of a look. And when you use oil based paint you must use oil based primer!! Water based latex or enamel paints will not stick to an oil primer.
Oh and next to the primer...That's my coffee as I decided to stop drinking Diet Coke (will save more on that for another post describing why I could probably donate my body for research on rat poisoning) Like any addict I am not sure how long my strike will last and like any addict I may talk myself into why the FDA would not hold back on the public but in all honesty I know for sure they prolly would! So we shall see. For now, coffee.....
Back to the makeover! There is my son, being exposed to the toxins I just mentioned in oil based paint:) Look at that smile, will ya?! Just kidding:) He just rolled the top then I kicked him out! Don't call child services yet!
And without boring you with the taping off details and the step by step process of rinsing brushes and swapping out paint to get the three tone look I wanted for it, I will instead just show you!! That's what you want anyway, right?! You can figure that the steps that got it from primer through two paint colors to finished product were just a mix of patience and a steady hand on the brush!!
OK so recall the BEFORE...
AFTER, A mid century modern buffet meets an art deco style room make over and a black white and brown bracelet for inspiration!! And hopefully, if I know at all what I'm doing, it will all mesh!
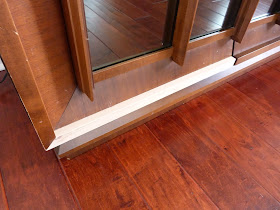
In a nut shell, I used a black oil based paint, just the pre mixed black they have in the section of oil based paints in Lowes. I used the black on the top and sides and then on a piece at the bottom (see later pictures for details on the bottom). Then on the trim pieces around the mirror I used the white pre mixed can in the same section. I left the original stained wood then for the area that angles in and surrounds the white trimmed out mirrored area and also some at the bottom. As a final coat, I used a gloss finish brush on polyurethane to protect the finish.
So what do you think?? Will it fit in with my decor in the room?! I have 2 side tables that are next to finish for either side of my emerald green sofa and I have two cain back chairs that I need to finish spraying before we reupholster them!! I am so excited about this room!! It feels good to have gotten this piece checked off the list!!
Cheers!!
{Laura}


It looks AmAzInG! Love the inspiration and how it turned out. So shiny and gorgeous!
ReplyDeleteLOL to "I love to get high when I can squeeze it in"!
Haha!! Just testing to see if anyone actually reads it:) you passed!! Thanks:)!!
Deleteoooh i love it! so funky and modern!
ReplyDeleteThank you Cassie:)!! Have a good weekend!
DeleteOMG!! You are so talented. I absolutely love it. great job! I really love the colors you chose. Very chic
ReplyDeleteThanks albertina:) that means a lot coming from a girl with your crazy talent!!
DeleteI love the inspiration piece that you used! And the pictures of your kids priming and prepping are perfect as well.
ReplyDeleteI love how the piece turned out, and how you styled it!
Lori
Thanks Lori:) the kids were home for a loooong break so I put them to work:) thanks for commenting!
DeleteLaura, it looks fabulous! I love the black, white and wood combo…looks so good!
ReplyDeleteHi Jesse! Thank you so much:)
DeleteI feel I’m vivacious on this art! The kids had done the best job. Lol. I adored how the it looks attractive, seems like I’m keen to know more about how you’d do it. Beautiful!!
ReplyDelete:D
Sebastian Chuter